layers of charm + a giveaway! (a fat quarter shop video tutorial)
i can’t believe the time has finally come for me to post about this huge secret i have been keeping! it feels like it’s been forever, but i’m so excited to get to share it with you all!
as a novice quilter and blogger, i was both over joyed and honored to receive my invitation to join the “layers of charm,” pattern testing and blog hop, put on by fat quarter shop.
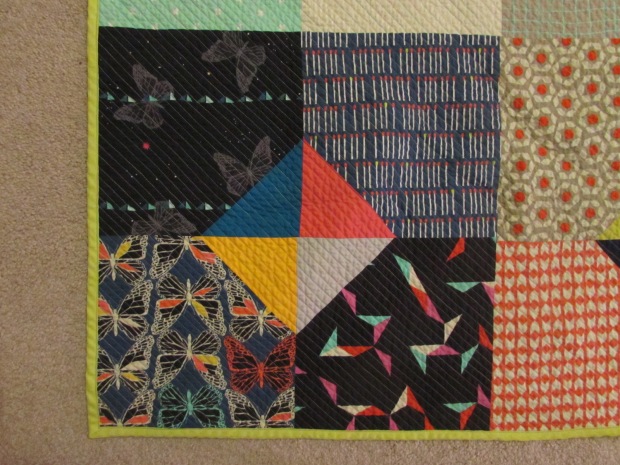
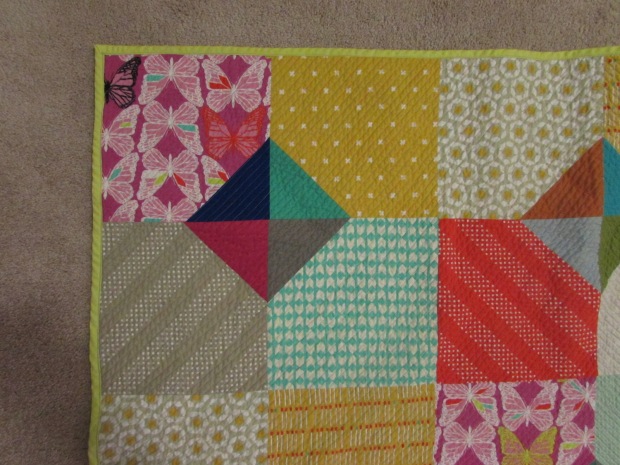
i used the exciting opportunity to “up my game,” and work with designer precuts, not just my joann fabrics stash. it didn’t take long for me to decide on rashida coleman-hale’s moonlit cotton and steel layer cake, and the summer kona cotton solids charm pack. i really think the colors play together quite nicely.
i’d have to say the hardest part about creating this quilt, was choosing fabric combinations for the blocks. in the beginning, i separated them into four color groups, and tried to make sure each one was represented. however, that proved too difficult. after doing a little research on how others have worked with this line, i found some inspiration, and was able to devise a plan.
after that, cutting and assembling were a breeze…so quick and easy! i have never worked with pinked edges before, so there was a bit of a learning curve for me in that aspect, but after some trial and error, i was able to knock it out. not saying it’s perfect by any means, but i for one am in love with how it turned out!
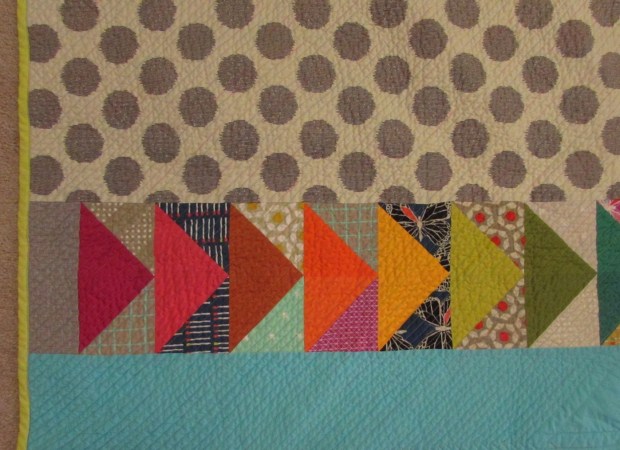
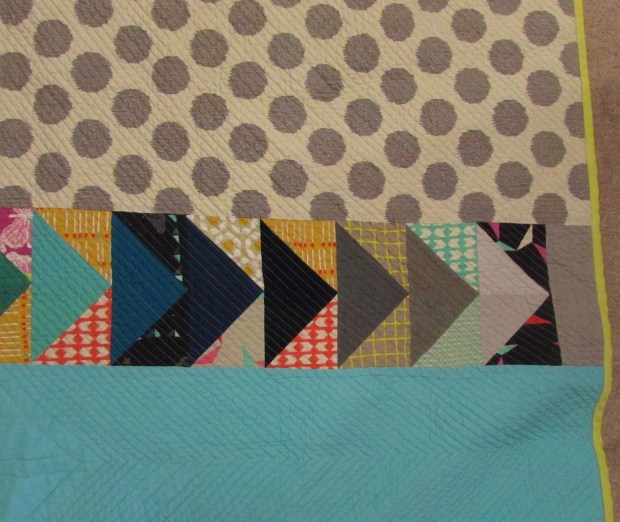
i know for a fact that i am not the first quilter to save scraps, and do something awesome with them…and this pattern was no exception to the rule. i turned all of the cut off corners into really fun hst (half square triangles), and used them to create a colorful row of flying geese.
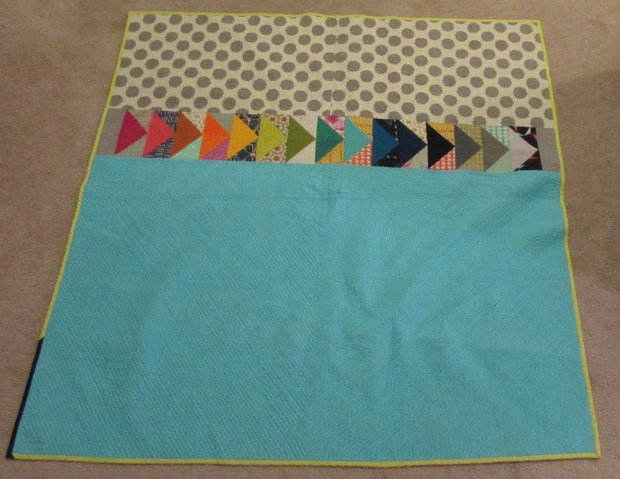
the majority of the quilts i’ve made thus far have pieced backs…and i really felt like i could go any direction i wanted to with this one. it’s so versatile! i paired tula pinks’ moon shine silver static dots up top, and a solid aqua from my local quilt shop below, then used the row of flying geese to separate them. aside from my shotty seam matching (pretend you don’t see that! oops!), i’m super pleased with how the back turned out. this blue is one of my favorite colors, and i think it really pops.
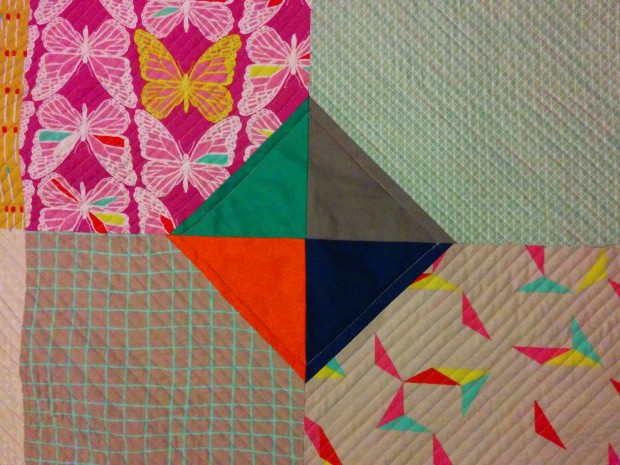
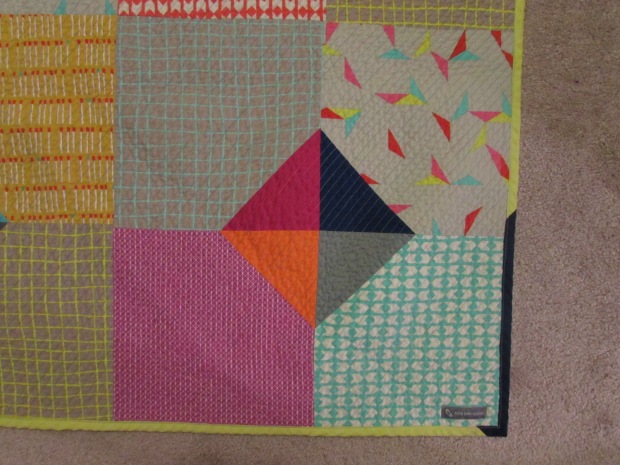
the most tedious part of the process was definitely the quilting…although i’m sure you could have assumed that. i used the very center “diamond” as my starting point, and radiated out from there. i used tiny 1/4 inch matchstick quilting
1. because i only know how to quilt in straight lines
and
2. because i LOVE LOVE LOVE the amazing crinkly texture they make after you wash them
and this quilt delivered just that!
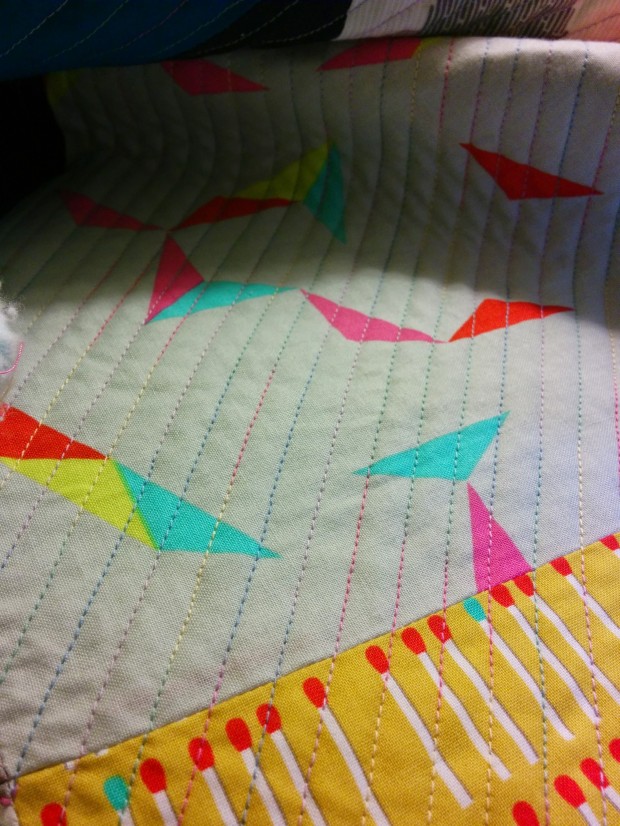
i don’t normally do any “my point of view from the sewing chair” pics, but this one was just too good to resist. i wanted to showcase the variegated thread, and how perfectly it goes with the fabrics. i originally wanted a rainbow variegated thread, but they only had a pastel one, and i was worried it would be lost in the sauce. luckily, i think it worked out in my favor.
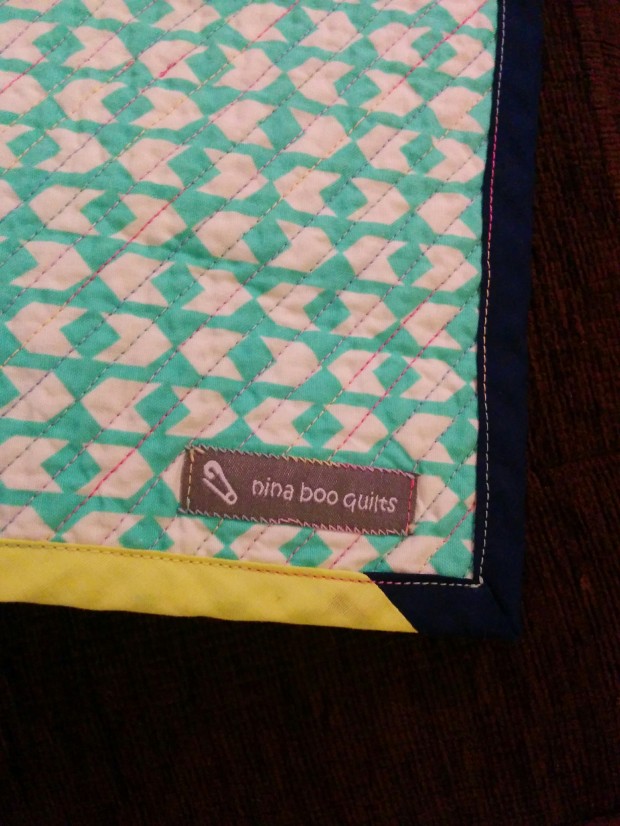
i picked out a citron bias tape for binding, and was just a couple inches short…so i improvised and filled in the bottom corner with navy. i stuck on one of my labels and called it a day!
measuring at almost 58 inches square, this is easily the biggest quilt i have made to date. it’s nice to have a quilt that completely covers me while i’m comfy on the couch, and it’s mine all mine!
now, let’s get down to de nitty gritty (as nacho libre would say)
since you are now absolutely dying to make this quilt, you can find the video tutorial here:
(video will go live at 9 am cst)
you can purchase the kit here, and the backing fabric here
*the kit includes fat quarter shop’s featured fabrics for this project, not the ones i have used for my quilt
*there are two different sizes, so please be mindful of that if you plan to use your own fabrics
*you may also notice that in their example, the center diamonds are all the same colored solid. however, the charm pack i used had a variety of colors, so this was not exactly an option for me. it does create a different feel, so consider this while planning your design
*when using directional prints, take your time and you’ll be fine
fat quarter shop has graciously allowed me to host a giveaway! and what could be better to win, than a layer cake of your choosing, to help get you started on this journey?! all you have to do is leave a comment telling me which layer cake you would love to make this pattern with. (please also leave your email address, so i will be able to contact you if you are the lucky winner.) i will randomly select next monday evening.
if you would like to take a look around at some of my other work while you are here, follow me on instagram, or share this post with a friend who might also love to win some free fabric, i would greatly appreciate it, but it is certainly not required.
THANK YOU so much for stopping by, and i do encourage you to check out fat quarter shop’s blog to see how others have made this pattern their own
once the snow clears and i am halfway presentable, i hope to take some much better outdoor photos of this beauty
❤ xtina





I would love a layer cake of folk song by amh, or the new doe line…my list is actually quite long, so I shall leave it there.
I like Bluebell by Nancy Gere layer cake. I must say that I really love your quilt and look forward to making one for myself. Thanks for sharing.
Pauline
perry94022 at hotmail dot com
Hmmmm. I would have to say Jennifer Sampou’s Black and White layer cake, since after making mine with Doe, I’ve been itching to make an all-black layer cakes plus bright pop of solid color charms version of the quilt. Your version came out fabulously! kitty.wilkin@gmail.com 🙂
I would love to make this with Tokyo train ride and some cotton and steel basics! Thanks so much!
tdkcarpenoctem@hotmail.com
This quilt is so gorgeous! I’ve been waiting for C+S Spellbound to make my hubs a quilt for his favorite holiday-I think this would be perfect! lauramcjohn @ yahoo.com.
Thanks for the great giveaway!!
This is so beautiful I would love to make this exactly like yours using the Cotton and Steel Moonlit layer cake and the Kona solids. Love❤️❤️❤️
Awwww thanks so much! 😘
I am a purple-lover so the Pansy Artisan Spirit Shimmer Tiles would be fun to work with this pattern!
Pingback: slice of humble pie + a giveaway winner | wips & tuts
I love your quilt! I have the Playful Tens layer cake and you have inspired me to make a similar quilt. I too am a newbie — your quilting looks great!
thanks so much! i’d love to see it when you are done 🙂
Pingback: no bake jolly bar blog hop | wips & tuts